Regular cleaning and maintenance of hiking shoes ensure they perform optimally, last longer, and provide the comfort and support needed for your hiking adventures. By taking care of your gear, you also contribute to your own safety, health, and the preservation of natural trails. Cleaning hiking shoes is essential to maintain their performance and longevity. Here’s a step-by-step guide on how to clean them properly:
Why Clean Hiking Shoes is Important?
Cleaning hiking shoes is important for several reasons, all of which contribute to the performance, longevity, and overall experience of your hiking adventures. Here are the key reasons:
Maintaining Performance:
- Traction and Grip: Dirt and debris can accumulate in the treads of your shoes, reducing their ability to grip surfaces effectively. Clean soles ensure better traction on various terrains, enhancing your safety.
- Breathability: Mud and grime can clog the breathable materials of your shoes, making them less effective at regulating temperature and moisture. Clean shoes maintain their breathability, keeping your feet comfortable.
Extending Longevity:
- Material Preservation: Dirt, mud, and other contaminants can degrade the materials of your hiking shoes over time. Regular cleaning helps preserve the integrity of the fabric, leather, and rubber components.
- Preventing Odor and Mold: Sweat and moisture trapped in dirty shoes can lead to the growth of bacteria and mold, causing unpleasant odors and potential health issues. Keeping your shoes clean and dry prevents this buildup.
- Comfort and Fit: Avoiding Irritation: Dirt and debris inside your shoes can cause discomfort and blisters. Clean shoes provide a more comfortable fit, reducing the risk of irritation and injury.
Maintaining Shape: Proper cleaning and drying techniques help shoes retain their shape, ensuring they continue to fit well and provide adequate support.
Health and Safety:
Clean shoes reduce the risk of infections caused by bacteria and fungi, which can thrive in damp, dirty environments. This is particularly important for foot health, especially on long hikes.
Aesthetic Appeal:
Appearance: Clean shoes look better, which can be important if you use them for various activities beyond hiking. Keeping your gear looking good also reflects your commitment to taking care of your equipment.
Environmental Considerations:
Trail Maintenance: Cleaning your shoes before hiking in different locations helps prevent the spread of invasive species. Seeds, spores, and other biological material can be transported in the mud on your shoes, potentially harming new environments.
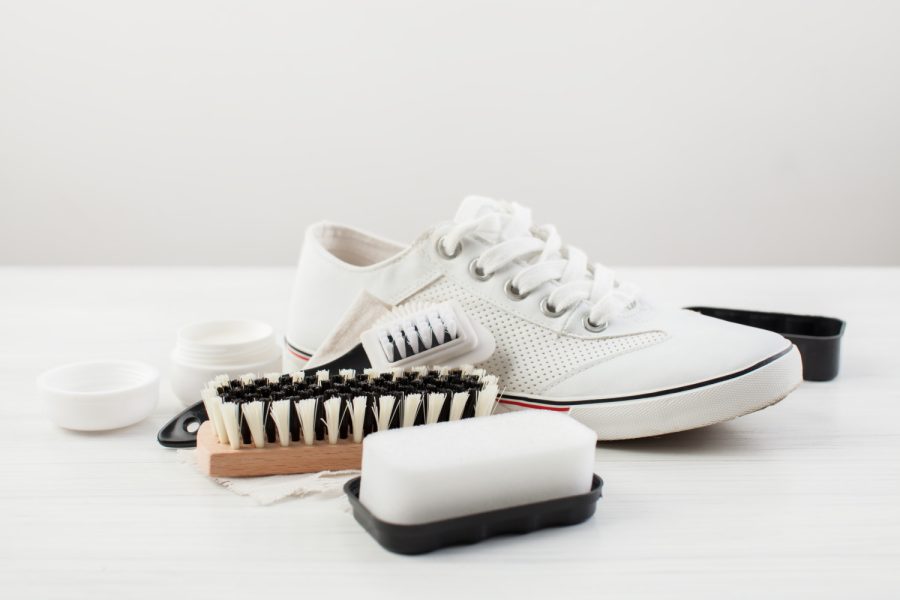
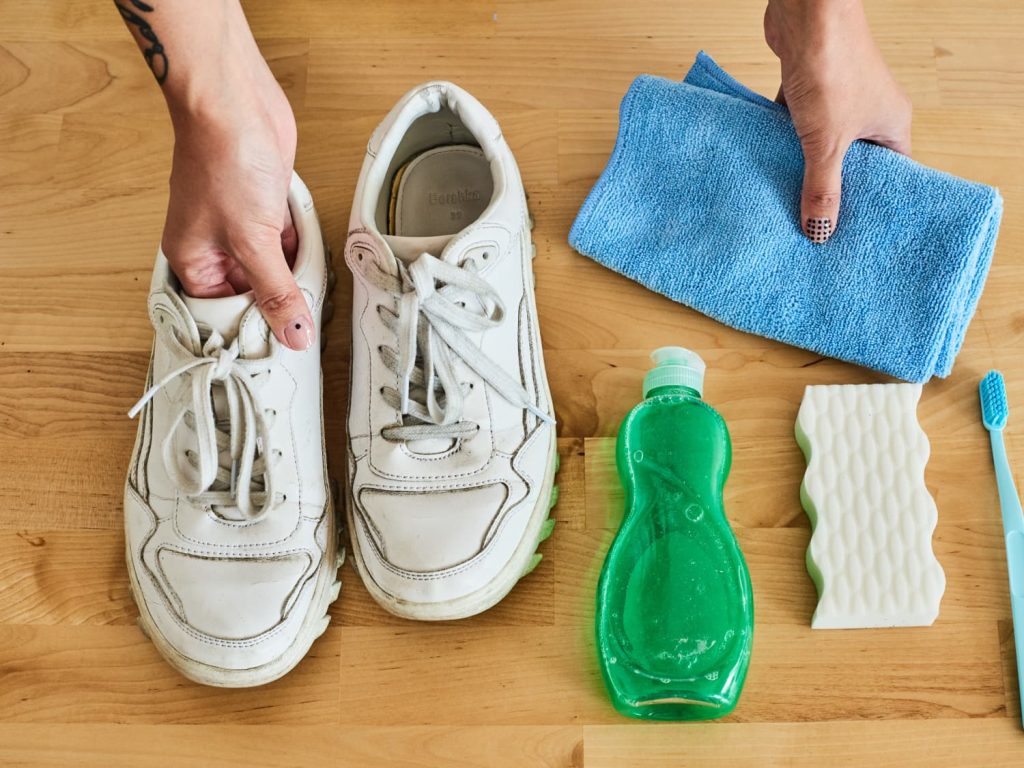
Materials Needed To Clean Hiking Shoes
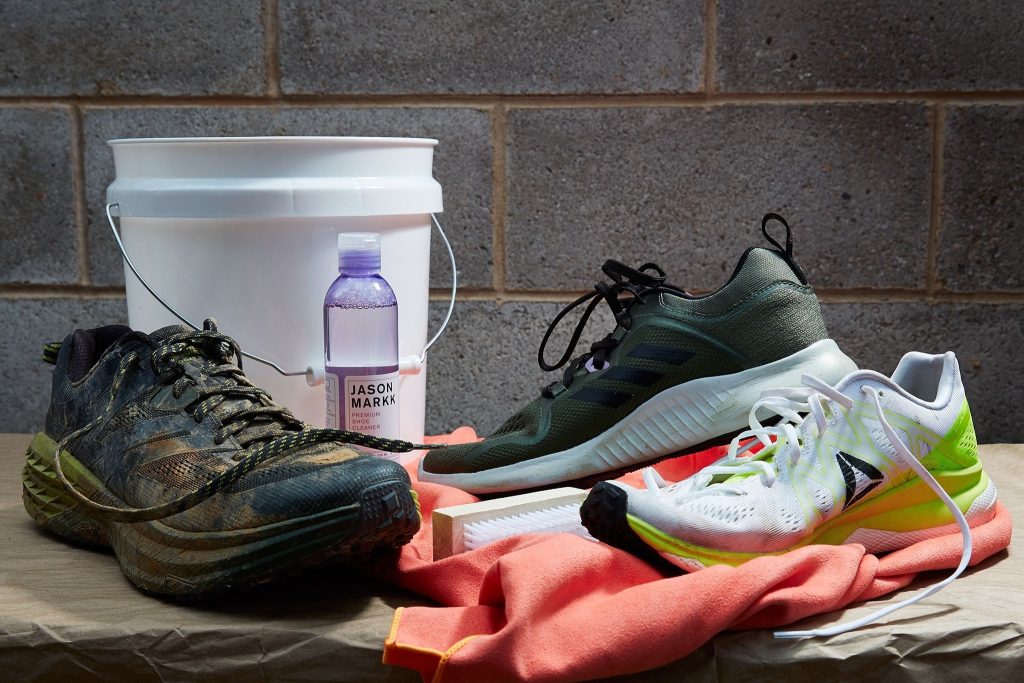
To effectively clean hiking shoes, you will need the following materials. Here is a detailed list, including why each item is necessary and how to use it:
- Soft Brush or Old Toothbrush
Purpose: To remove loose dirt and debris from the surface, seams, and treads of the shoes.
How to Use: Use the brush to gently scrub away dirt. An old toothbrush is especially useful for reaching small or intricate areas. - Mild Detergent or Specialized Shoe Cleaner
Purpose: To clean the fabric and surfaces without damaging the materials.
How to Use: Mix a small amount of mild detergent (like dish soap) or a specialized shoe cleaner with warm water. Avoid using harsh chemicals, as they can damage the shoe material. - Warm Water
Purpose: To create a cleaning solution and rinse off soap residue.
How to Use: Mix with detergent or shoe cleaner for washing, and use clean water for rinsing. - Cloth or Sponge
Purpose: To apply the cleaning solution to the shoes and wipe away dirt and soap.
How to Use: Dip the cloth or sponge in the soapy water, wring out excess liquid, and gently scrub the shoe surface. Use a clean, damp cloth to wipe away soap residue. - Paper Towels or Newspaper
Purpose: To stuff inside the shoes to help them retain their shape and absorb moisture during the drying process.
How to Use: After cleaning, crumple paper towels or newspaper and place them inside the shoes. Replace them periodically as they become damp. - Drying Rack or Well-Ventilated Area
Purpose: To air dry the shoes without exposure to direct sunlight or heat sources, which can damage the materials.
How to Use: Place the shoes in a well-ventilated area, ideally on a drying rack, to allow air circulation and even drying. - Optional: Waterproofing Spray
Purpose: To reapply a waterproof coating, especially if your shoes have a waterproof membrane or are made of leather.
How to Use: Once the shoes are completely dry, apply the waterproofing spray according to the manufacturer’s instructions. This helps maintain the waterproof properties of the shoes. - Optional: Old Towel
Purpose: To place under the shoes while cleaning to catch drips and debris.
How to Use: Lay the towel on the ground or a work surface before starting the cleaning process to keep the area clean.
Summary of Use:
- Preparation: Remove laces and insoles.
- Initial Cleaning: Use the brush to remove loose dirt.
- Washing: Clean with a cloth or sponge dipped in warm, soapy water.
- Rinsing: Wipe with a clean, damp cloth.
- Drying: Stuff with paper towels/newspaper and air dry.
- Finishing: Optionally apply waterproofing spray once dry.
- Having these materials on hand will ensure a thorough cleaning process, maintaining the performance and longevity of your hiking shoes.
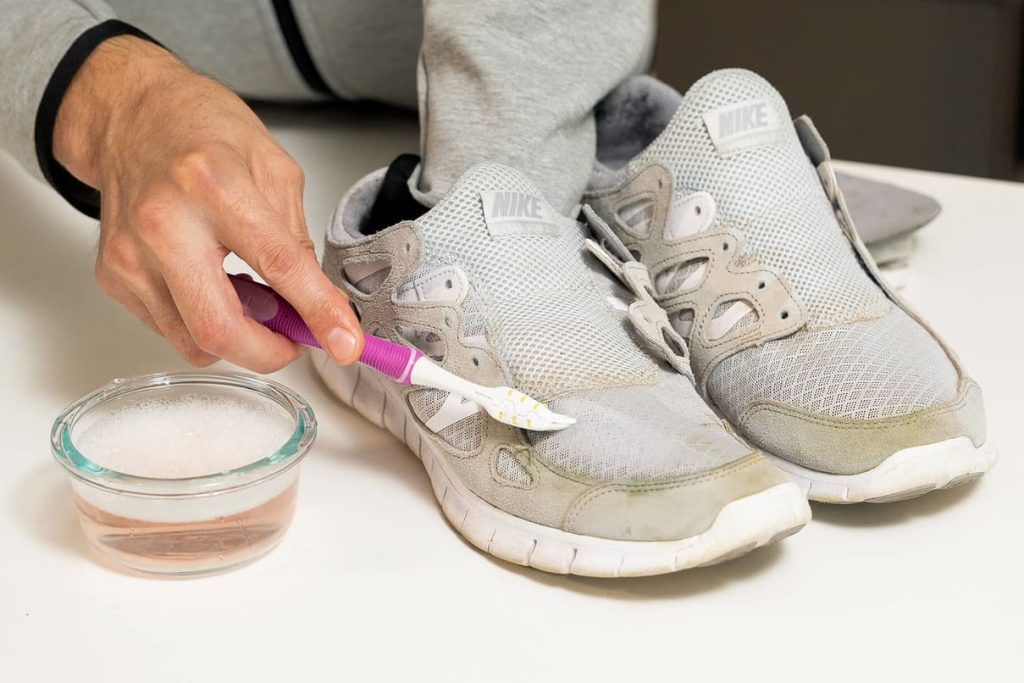
Steps To Clean The Hiking Shoes:
- Remove Laces and Insoles:
Take out the laces and insoles from your shoes. This allows you to clean every part thoroughly. You can wash the laces separately by hand or in a laundry bag in the washing machine. - Remove Loose Dirt:
Use a soft brush or old toothbrush to remove loose dirt and debris from the surface of your shoes. Pay special attention to the soles and seams. - Clean the Surface:
Prepare a mixture of warm water and mild detergent or specialized shoe cleaner.
Dip a cloth or sponge into the soapy water and gently scrub the surface of the shoes. Avoid soaking the shoes, especially if they are made of leather or have waterproof membranes. - Clean the Soles:
Use the brush or toothbrush to scrub the outsoles, focusing on removing dirt and grime from the treads. You can use the soapy water for this as well. - Rinse:
Wipe down the shoes with a clean, damp cloth to remove any soap residue. Ensure you don’t over-saturate the shoes with water. - Drying:
Stuff the shoes with paper towels or newspaper to help them retain their shape and absorb moisture. Replace the paper periodically as it becomes damp.
Let the shoes air dry in a well-ventilated area, away from direct sunlight and heat sources, which can damage the materials. Drying may take 24-48 hours depending on the shoe material and level of wetness. - Clean the Insoles:
If the insoles are particularly dirty or smelly, scrub them gently with the soapy water mixture and rinse them well.
Let the insoles air dry completely before putting them back into the shoes. - Re-lace and Waterproof (Optional):
Once the shoes and insoles are completely dry, reinsert the insoles and laces.
Apply a waterproofing spray if needed, especially if your shoes are made of leather or have a waterproof membrane. Follow the manufacturer’s instructions for best results.
Some Useful Tips
Avoid using harsh chemicals or abrasive brushes, as they can damage the materials of your hiking shoes. Never put hiking shoes in the washing machine or dryer, as this can deform and damage them. Regular cleaning after hikes, especially in muddy or wet conditions, can help prolong the life of your shoes.
By following these steps, you can keep your hiking shoes in good condition, ready for your next adventure.